Skip to main content
Menu
Industry
Technology
Catalogue
Products
Articles
About
Contact
Türkçe
twitter
facebook
linkedin
Press enter to begin your search
Close Search
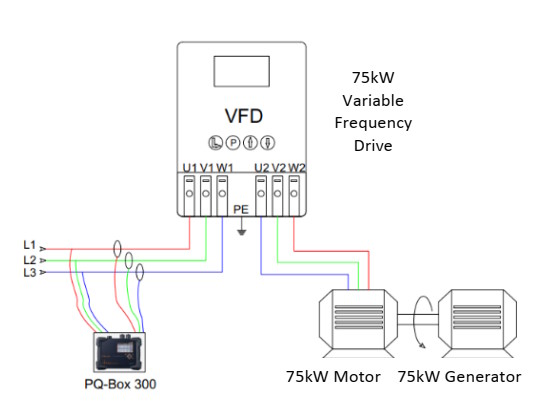
Figure-4: Laboratory Test Setup
Figure-4: Laboratory Test Setup
Share
Share
Share
Pin
Close Menu
Industry
Technology
Catalogue
Products
Articles
About
Contact
Türkçe